Guide To Large Format Print Files
Guide To Large Format Print Files
- Raster vs Vector Files
- Resolution
- Scale
- Color
- Bleed
- Strike Off's
- Sending The Creative Promo Your Files
Scale
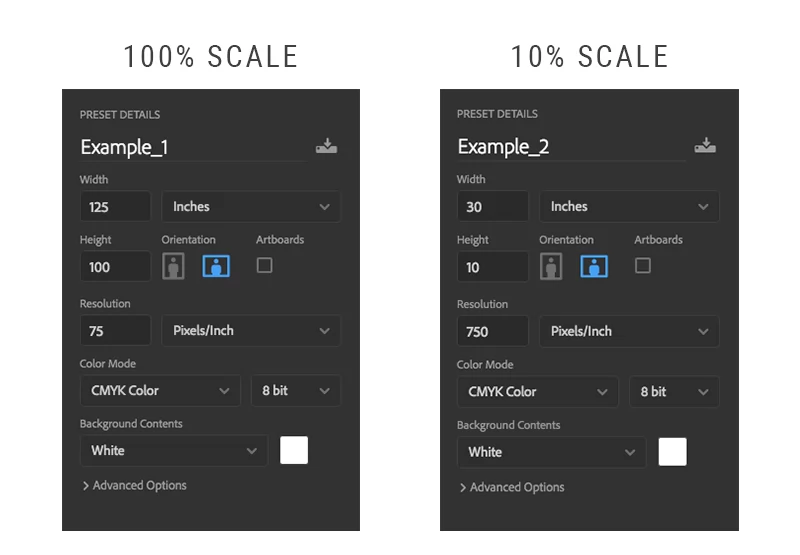
100% Scale
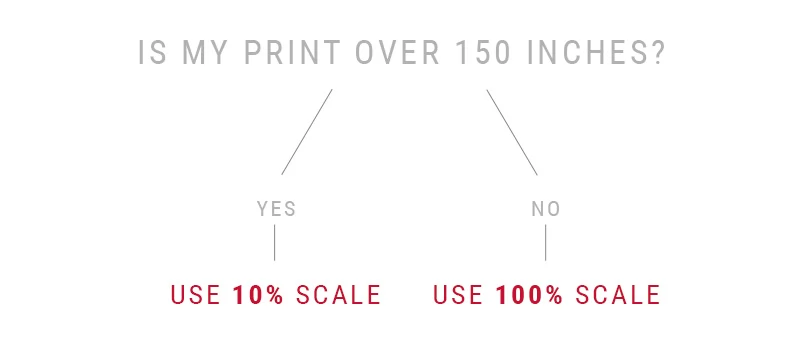
At 1/1 scale or 100% sizing, your resolution can be set to 75 dpi. For example, if your final print needs to be 125” by 100”, you would set your file to 125”x100” with a 75 dpi resolution setting. Viewing these files at actual size on your screen can be helpful in previewing print quality, but be sure to calibrate your monitor’s “print size” settings in Photoshop or Illustrator first or else the preview will be inaccurate. When done properly, an inch on screen will match an inch on a ruler held up to the screen.
10% Scale
If your print is going to be over 150”, you should set your file up at 10% scale. In this instance, if your final print needs to be 300” by 100”, you would set the dimensions of your file to 30”x10”. For your resolution, you’ll increase the standard dpi of 75 by 100% and set the file up with a 750 dpi resolution. An easy rule of thumb is to move the decimal one spot to the left in your file dimensions, and one spot to the right in your dpi.
Overview :
We can assist you with file preparation for print, whether you want to do it yourself or would rather our Creative Promo team handle it. You can upload your files right now if you’re prepared to deliver them. Follow the instructions below while setting up your files if you want to save time or simply learn something new.
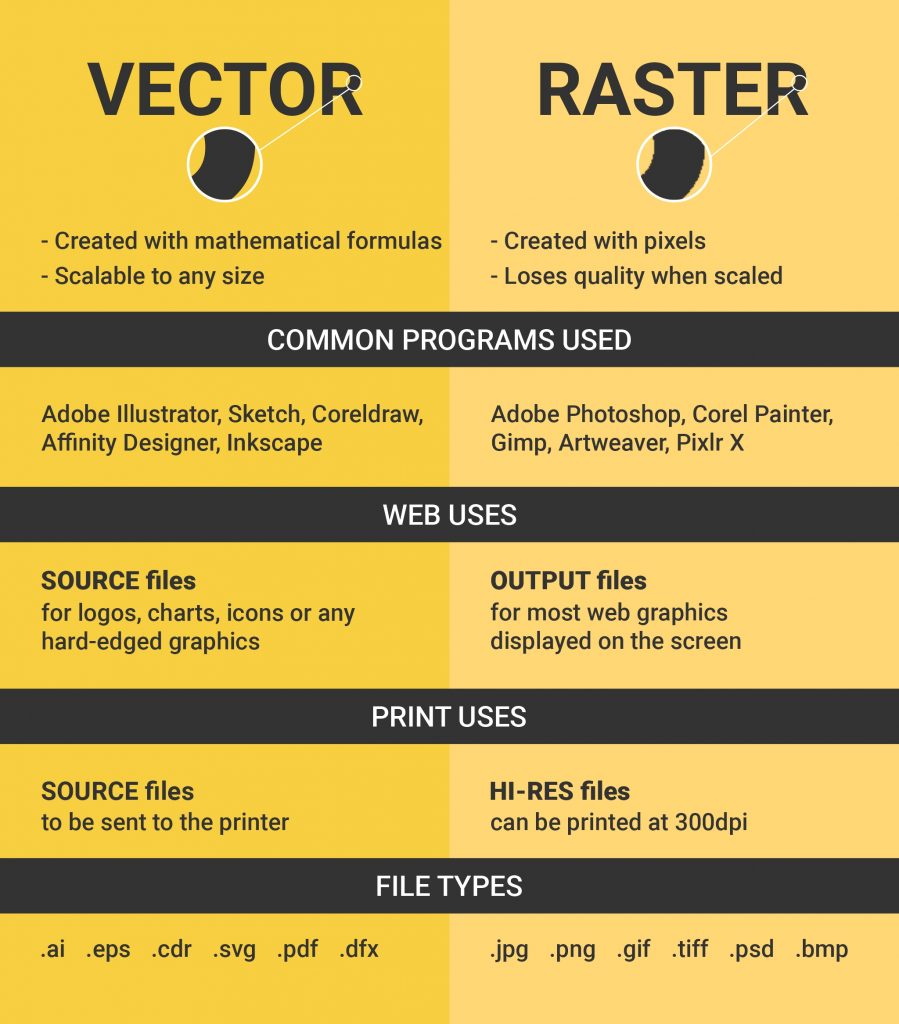
We accept jpg, jpeg, tif, psd and pdfs originating from raster files.
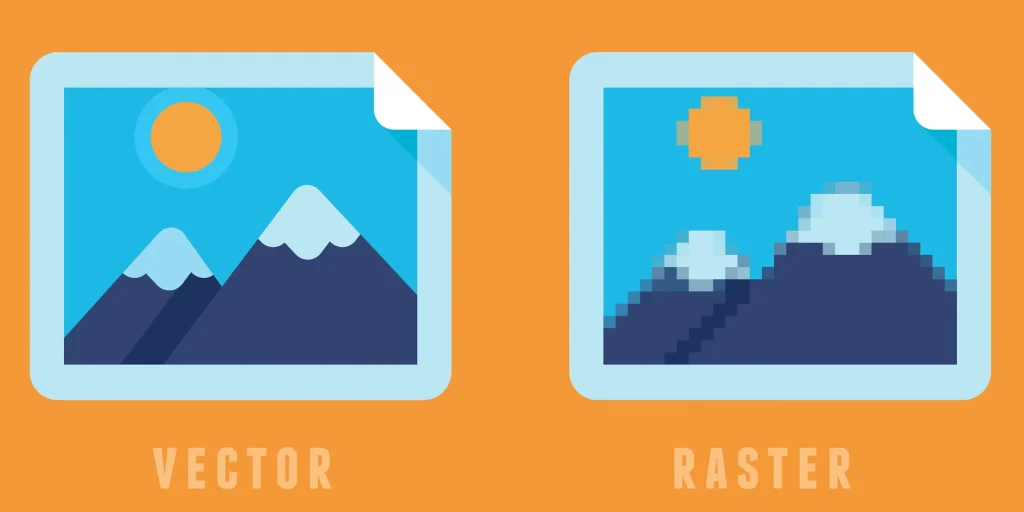
Photos are stored in raster files. If your print contains a lot of photography, a raster file would be used. It’s crucial to keep in mind that the resolution determines the print quality while selecting photos. To guarantee that your art will print at a great quality, you should have a high resolution image. Because there are a fixed amount of pixels in each image because photos are formed of pixels, drastically enlarging an image could degrade its quality. To increase the quality of your image, you cannot add more pixels.
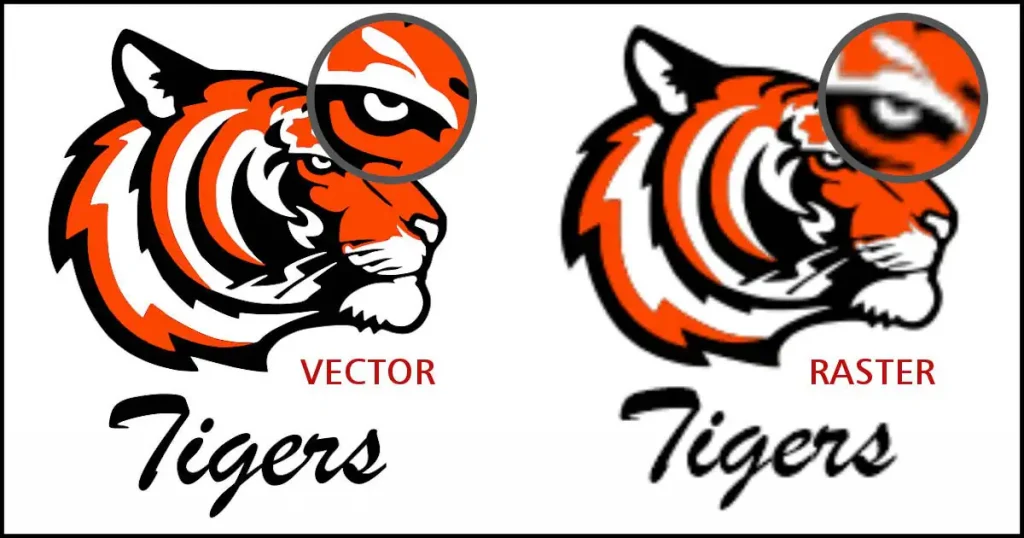
Instead of using pixels, a vector file uses data points and lines. The image can be substantially scaled without losing quality due to the points and lines. This is because vector pictures are more flexible to scale for size without sacrificing quality as they are created using mathematical formulas rather than pixels.
Vector files should be used whenever possible in large format prints because of the ability it provides to infinitely resize your art. Since vectors are made up of data points connected by lines rather than square pixels, the quality of your print will not change even when it’s dramatically resized
We accept AI, eps, and pdf’s originating from vector files.
When you’re ready to deliver your files, you’ll want to make sure to outline all text. To create outlines in Illustrator:
- Select the text that needs to be outlined
- In the top menu, select “Type”.
- In the drop-down menu, select “Create Outlines”
This will change your text from a font to data points with connecting lines, providing scalability and eliminating the need for you to send the font itself as a separate file.
When it comes to file preparation of large-format printing, there’s a different mode of thinking. The traditional rules of file dimension and resolution used in standard offset printing don’t necessarily apply. Where traditional print methods have you working in the 300 dpi range, large format basically reverses that thinking altogether. This is where a number of traditional print designers and desktop publishers find themselves in unfamiliar territory. There’s a common misconception that bigger files need more resolution than normal print jobs – this is simply not true. All this does is give you a really huge file size.
Preparing files for large format printing does not usually require the higher 300 dpi image files commonly associated with other printing methods. 300 dpi images at large sizes can produce extremely large files in the gigabyte range. This is usually not necessary, and places extra burdens on all raster image processing systems (RIPs). You will find a wide range of opinions when researching this subject. When setting up images with the document size set at full size (the size of the printed product) it is only necessary to set the pixel size at 75 dpi for most types of banners. If the actual printed size is over 150”, then you can set your document size to 10% of actual print size to optimize file sizes.
Color is an important component in understanding how to set up your files for large format printing.
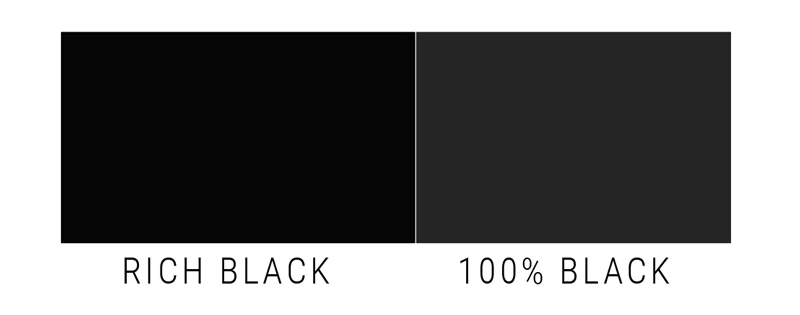
Rich Black
When using larger areas of black, use Rich Black instead of Standard 100% Black. Rich Black is CMYK 40C, 60M, 60Y, 1OOK. When graphic designers “Fill with Black”, Photoshop fills your selected area with only black ink (100% K). Rich Black contains elements of other colors to produce a darker, more saturated true black.
CMYK, PANTONE, RGB
The easiest way to imagine how color works is to think of your color as paint buckets. CMYK is a combination of the four colors that mix together in order to create your one desired color. Pantone can be thought of as one pre-mixed color. They’re used to ensure that your color is the same at all times. RGB is a mixture of the red, green, and blue used for web.
What is CMYK and when do I use it?
CMYK colors are made up of cyan, magenta, yellow, and black. They combine the four colors in order to create your desired color. CMYK colors are used for printing, as the ink in the printers are cyan, magenta, yellow, and black. Anytime you are creating a print from a digital file, you will want to send your file to the printer in CMYK.
What is RGB and when do I use it?
RGB colors are made up of red, green, and blue. RGB colors are typically used for web or anything being viewed on a screen. These are not printing colors.
What is Pantone and when do I use it?
Pantone (PMS) colors give you the ability to have one true, specific color. Pantone colors are often used in a corporate branding. Pantone colors give companies the ability to have consistent, recognizable branding. They can choose their Pantone colors and ensure consistency in all prints, making it recognizable to customers.